As a child, for some reason I really really wanted to make the best paper plane possible.
I tried a lot of fancy designs, most of which were worse than the classic pointy “dart”. Nothing was better than one of the early ones I found, which in the classic form I learnt is made like like this.
- Fold a sheet of A4 paper lengthways, then unfold it again.

- With the valley side of the folded paper up, fold the corners of one end to the centre line created by the fold, so that they create triangles at 45 degrees.

- Turn the paper over so the peak side of the fold is upwards. Then fold back the triangular section formed by the folded corners so the point aligns with the central fold and the longest side of the triangle becomes one side of the overall rectangle.

- Now take the corners where the triangle and the main rectangle meet, and fold them to the centre so the points that were the rectangle corners meet each other on the centre-line a little way behind the point of the folded-in triangle.

- Fold that point of the folded-in triangle back on itself to trap the corners you just folded in beneath it.

- Now re-fold the whole sheet along the original lengthwise fold, in half symmetrically.

- Form the wings by folding down the two sides so the sloping edge exactly follows the bottom edge of the folded shape. When unfolded, that makes a plane with almost-trapezoidal wings, a flat blunt nose and a keel that is deeper at the back than the front.

The final result looks almost like this (you’ll have to read to the end to know the difference):
This paper plane design is very nearly as good as you can get. It’s reliable, it flies in a very stable way for long distances, and you can tweak it to perform acrobatic stunts.
As a child, though, I was convinced it could be better. It felt to me as though it could have more wing. And the shape of those wings felt wrong. The general feel of the plane’s shape says they should be a proper delta.
So, my ten-year-old reasoning went like this – I can’t fold extra wing area into existence, so I need more paper in the first place. It felt logical. And I wanted those wings to be more shapely, because prettier must work better, surely?
The answer was to unfold a plane that worked, place it on a piece of A3 paper, and draw round the unfolded A4 as a base. I then took a ruler, extended the fold lines that had been formed by creating the wings out beyond the original A4, and created a new shape like a rectangle with tacked-on triangles.

At this time of writing (in my lunchtime) I’m not going to find a bigger piece of paper and cut it to shape so I can demonstrate. But the result is more like an Avro Vulcan bomber. Which must be better, surely.
… and it is better, but barely. It’s much more sensitive. It has a bigger wing area, but the outer leading edge can flex and twist. So made accurately, thrown carefully, in smooth air, it flies beautifully. But otherwise not. I made it better again by slightly tweaking the shape so that the wing fold introduced a doubled-over leading edge, and that was better. But overall, it didn’t feel worth creating a special shape of paper every time I wanted a paper plane. So my unique design has been dormant until now.
… and what’s the point?
Some ten or twenty years later, for some reason I found myself making a paper plane again. I can’t remember why. And as an adult, the same question struck me again – how could this design be improved? Surely as an adult I’d have a more sophisticated answer?
I thought the same as I’d thought at ten years old, that the wings weren’t enough. As an adult, though, there was a more obvious answer.
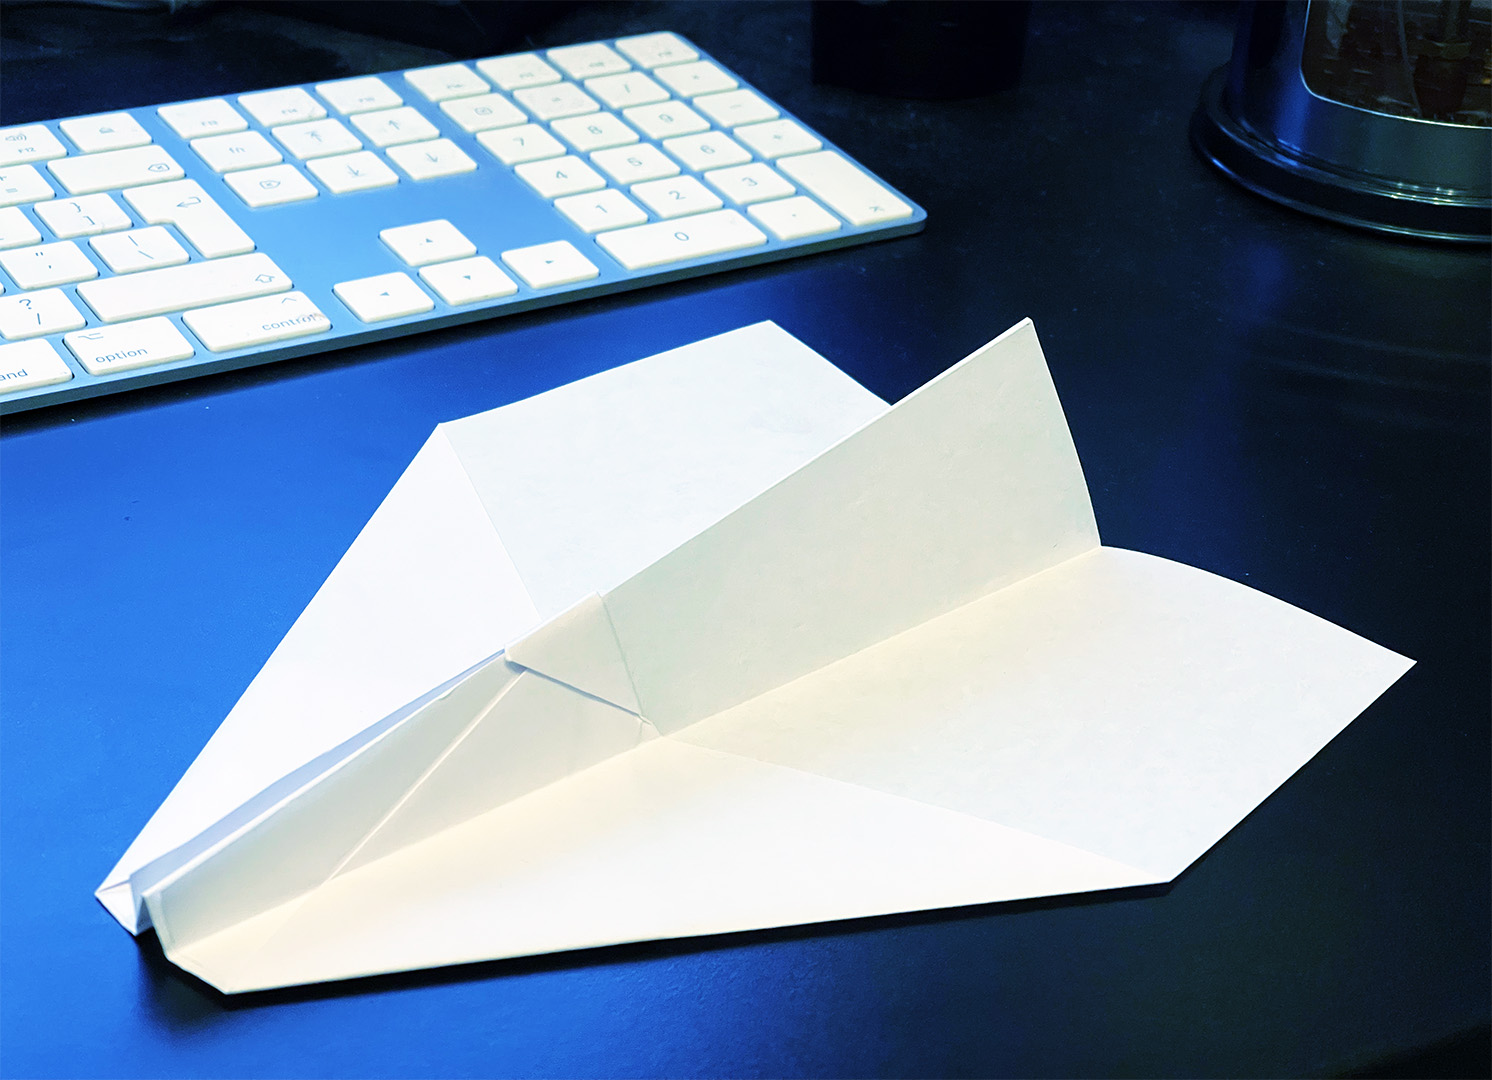
Step seven (above) is what I was taught to do: fold the wings to meet the base. But you don’t have to. If you want bigger wings, you can just fold them down further. No complicated geometry, no A3 paper, no cutting, and no fiddling with unstable edges. Sometimes age and wisdom brings simpler solutions.
And that’s what the plane in the picture is like, because that’s how I make them for my son.
So far he hasn’t noticeably started looking for a better way.